RovePlan

First-Time RV Pre-Trip Walkaround & Setup Checklist

Reviewed by RovePlan Editorial TeamUpdated 2026-11-197 min guide26 items in default profile (24 essential)

A sequential 26-item departure-day procedure checklist for new RV drivers and renters—covering interior latch lockdowns, exterior hitch checks, arrival hookup order, and dump station basics.

Disclosure: As an Amazon Associate, RovePlan earns from qualifying purchases. Read full disclosure.

Filter, Customize & Print Checklist

Trip Profile

All rigs · All Hookup Types · All Seasons · 2-3 nights · 2 travelers

0 / 26 items packed (0%)24 essential remaining

Print blank for a pen-and-paper clipboard list, or check items below first.

0 of 26 checked

Prints cleanly with pen-ready checkboxes (blank or filled).

Add Custom Trip Item (Saved Locally)

24 essential remaining

0/26 packed

Packing & Pre-Trip Field Notes

Avoid the #1 Rookie Mistake: Distracted Hitching & Unhitching

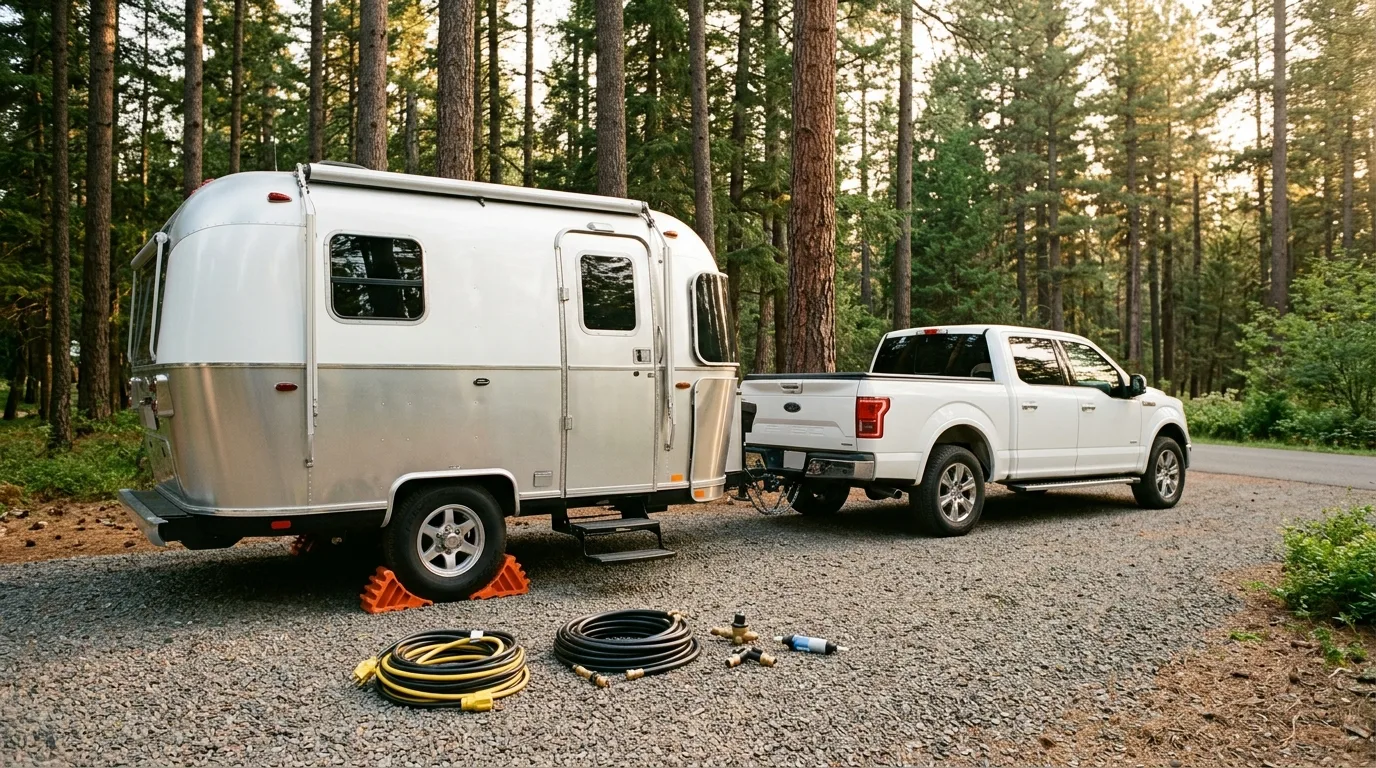
Almost every minor RV fender-bender or dropped trailer happens when well-meaning camp neighbors interrupt your hitching routine. Agree with your travel partner on a strict no-chatting rule during the 5 minutes you chock wheels, connect chains, test the breakaway lanyard, and run your 360-degree exterior walkaround.
Master the Correct Campsite Arrival Sequence: Level, Chock, Power, Water

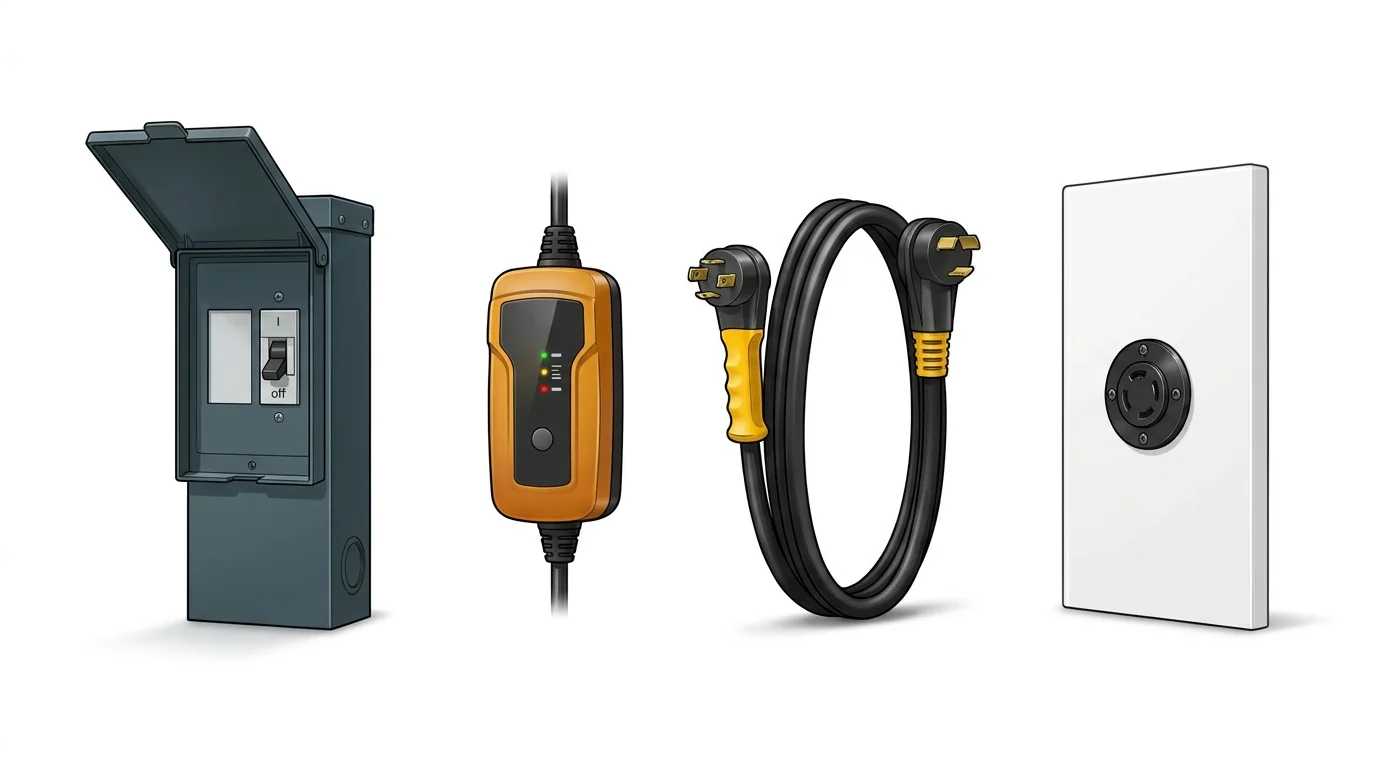
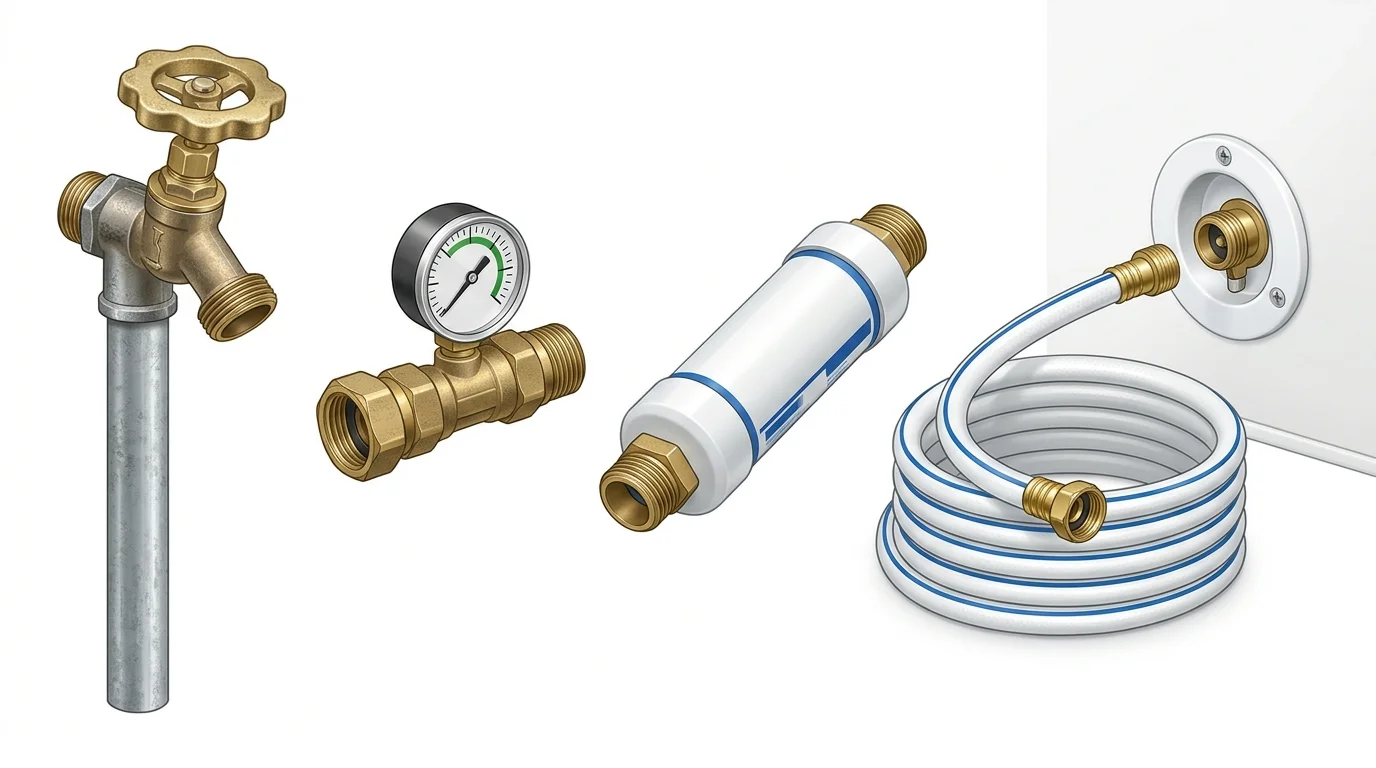
Always level side-to-side on interlocking blocks and pin heavy rubber wheel chocks tightly before unhitching—and never use stabilizer jacks to lift tires off the ground. Next, flip the power pedestal breaker OFF, plug in your EMS surge protector to verify green diagnostics, and only then connect your shore cord. Finally, flush the water spigot for 15 seconds onto the ground and attach your brass pressure regulator first.

Visual Setup & Hookup Sequence Reference

Technical illustrations of standard US campground hookup order and leveling safety geometry (always confirm ratings in your RV owner's manual).

A. Safe Shore Power & Fresh Water Hookup Sequence

Protect coach electronics & PEX plumbing

ELECTRICAL (30A TT-30P / 50A 14-50P) — TURN BREAKER OFF BEFORE PLUGGING

Illustration: Four-step US RV shore power hookup sequence from left to right: campground power pedestal with breaker off, inline EMS surge protector, heavy-duty 30A/50A shore cord, and RV twist-lock shore power inlet
  1. 1. Pedestal

    Breaker OFF first

  2. 2. EMS Surge Guard

    Verify polarity & voltage

  3. 3. RV Shore Cord

    Lock twist-ring inlet

  4. 4. Breaker

    Switch ON

POTABLE WATER (NSF/ANSI 61) — FLUSH SPIGOT BEFORE ATTACHING HOSE

Illustration: Four-step US RV fresh water hookup sequence from left to right: campground water spigot, brass 40 to 50 PSI pressure regulator with gauge, inline potable filter cartridge, and drinking water hose to RV city water inlet
  1. 1. Camp Spigot

    Flush 10 seconds

  2. 2. Pressure Regulator

    Clamp to 40–50 PSI

  3. 3. Inline Filter

    Follow arrow direction

  4. 4. Potable Hose

    To RV City Inlet

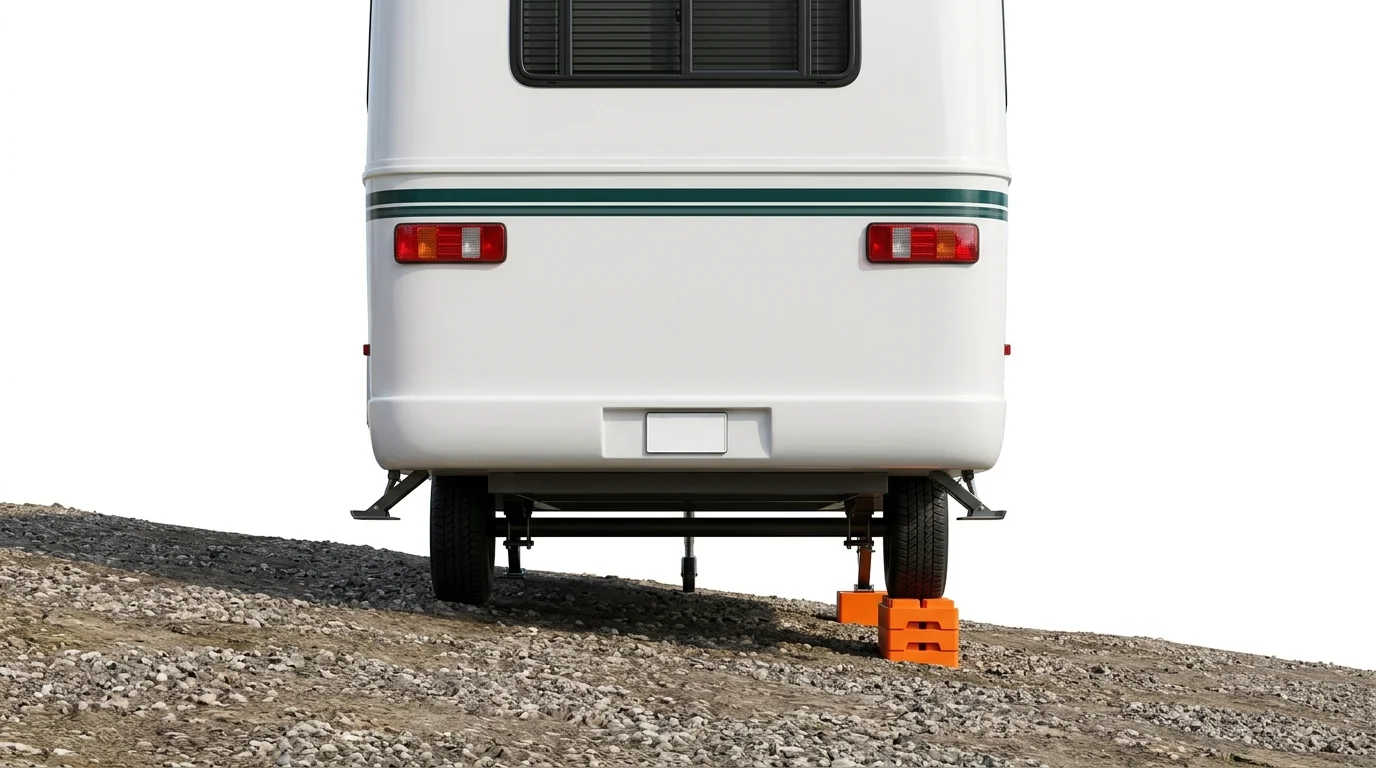
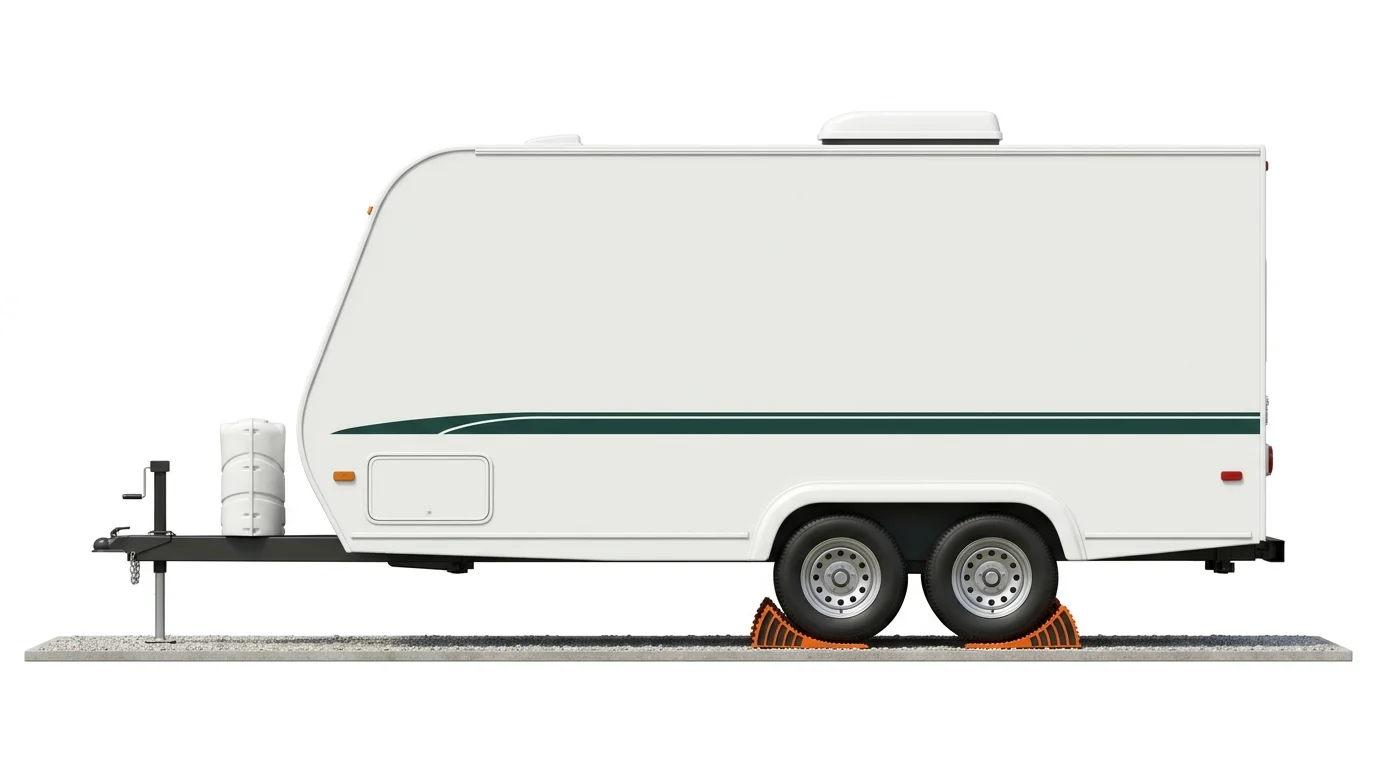
B. Campsite Leveling Blocks & Wheel Chocking Geometry

Chock wheels BEFORE unhitching

STEP 1: LEVEL SIDE-TO-SIDE FIRST

Axle Bubble Level
0° Level
Illustration: Rear view of travel trailer resting level on sloped campsite ground with interlocking orange polymer leveling blocks stacked neatly under the low-side tire

Blocks under low-side tire

STEP 2: CHOCK TIRES BEFORE UNHITCHING

Jack AFTERUnhitch & level front-to-back second
Illustration: Side view of tandem-axle travel trailer with heavy-duty orange wheel chocks wedged tightly in front of and behind the tires before raising the front tongue jack

Chocks wedged tight front & rear

Why We Specify These Hardware Ratings

  • EMS vs. Basic Surge Strips: Full Electrical Management System (EMS) units cut power during open neutrals, reverse polarity, or sustained low-voltage brownouts—basic surge strips only absorb brief spikes.
  • 40–50 PSI Lead-Free Brass Regulators: Unregulated US park spigots can exceed 80–100 PSI; capping pressure protects interior PEX crimps and water heater check valves.
  • NSF/ANSI 61 Potable Hoses: Residential green garden hoses are not certified food-grade and can leach plasticizers into coach lines.
  • 15A Household Adapters: Limited strictly to ~1,500W for battery charging and lights—never power roof A/C compressors or electric water heaters through a 15A outlet.

US Safety Standards & Reference Sources

Always verify exact specs in your coach and tow-vehicle owner's manuals.

Field Guide: Key Specs, Pitfalls & Timing

First-Timer Quick Reference

Key Numbers & Rules of Thumb

  • Side-to-side first: always level left-to-right on interlocking blocks before unhitching or extending auto-levelers, then level front-to-back with the tongue jack.
  • Chocks before jack: wedge rubber chocks tightly front and back of tires BEFORE unhitching safety chains or lifting the coupler off the hitch ball.
  • Water & power safety order: pedestal breaker OFF -> plug EMS surge guard -> plug RV cord -> switch breaker ON; flush spigot 10s -> 40–50 PSI brass regulator -> filter -> hose.
  • Gray-after-black dump: drain the black tank first, flush with black-tank rinser or bucket, then drain the gray tank last so soapy sink water washes the sewer hose.

Common Rookie Mistakes to Avoid

  • Leaving the black tank valve open at a full-hookup site: liquids drain out while solids pile up into a hardened "poop pyramid" that blocks sensors and drains.
  • Forgetting to extend the spotter outside when backing—agree on clear hand signals and "STOP means STOP" before touching reverse.
  • Driving off while still plugged into shore power, city water, or with the TV crank-up antenna/stabilizer jacks still down.
  • Tightening stabilizer jacks to lift the trailer wheels off the ground—stabilizers only steady bounce after tires carry the weight.

Pre-Trip Timing & Prep

  • Practice driveway dry-run (3 days out): test hitching, backing 20 feet using mirrors, plugging in your 15A/30A cord, and tracing where low-point drains and dump valves live.
  • Departure walkaround (10 mins before roll): circle the rig counter-clockwise touching coupler latch, crossed chains, breakaway cable, lug nuts, bay latches, and roof vents.
  • First 5 miles: pause at a safe turnout to feel trailer brake controller gain response and double-check mirror sightlines.

Frequently Asked Questions

What order should I unhook my travel trailer at a campsite?
First, pull onto your leveling blocks so the trailer is level side-to-side. Second, place heavy rubber wheel chocks tightly on both sides of the tires while still hitched. Third, lower your tongue jack onto a jack block, unlatch the coupler, disconnect chains and 7-way cable, and pull the tow vehicle forward before lowering rear stabilizer jacks.
Which holding tank do I dump first at an RV dump station?
Always pull and dump the black (toilet) tank valve first until it runs clear, then close the black valve and open the gray (sink/shower) tank valve last so soapy gray water flushes out the inside of your sewer hose.
Should I leave the black tank valve open at a full-hookup campsite?
No. Leaving the black tank valve open allows all liquids to drain away immediately while solid waste dries and builds into a hardened pyramid clog inside the tank. Keep the black valve closed until it reaches at least 2/3 full before dumping.
What does an RV EMS surge protector check before plugging into power?
An Energy Management System (EMS) surge protector tests the campground pedestal for reversed hot/neutral polarity, open ground, high/low voltage brownouts, and dangerous 240V miswiring before allowing power to enter your coach.
View all 15 checklists →